“Welcome to the Arduino tutorial I wish existed when I started hardware hacking. Arduinos are awesome! But an Arduino doesn’t in and of itself do anything. In some ways it’s like a whiteboard: the whiteboard doesn’t write on itself, it’s what you do with the whiteboard that makes it a useful tool. This is why Arduino is called a platform. It enables you to build all kinds of amazing things, but it’s a blank canvas.”
Julia Grace is the Director of Infrastructure Engineering at Slack & Mentor at Hackbright Academy. She was formerly the CTO of Tindie where she was the first employee and built the engineering team from the ground up.
 A couple years ago, I was very new to hardware hacking, hadn’t touched a solder in over a decade, never used an Arduino or Raspberry Pi.
I wanted to play around with an Arduino but I didn’t know where to begin. I joined Tindie as the first employee in fall 2012. Tindie is a marketplace for all things electronics (printed circuit boards to robots to drones) and that fueled my interest in hardware even more. I’m a software engineer, love programming and preferred to program in Python on my Arduino instead of learning another new language. This was partially because all the cool third party libraries I love have Python bindings.
The tutorial is for you if you:
• Have some understanding of how to program. Teaching Python programming or programming in general is more than I could tackle here.
• You are comfortable using the command line.
• Know what GitHub is, have a basic understanding how to use it and can fork a repository.
• Want to learn how to program your Arduino to send a SMS text message at the push of a button!
Background
Welcome to the Arduino tutorial I wish existed when I started hardware hacking.
Arduinos are awesome! But an Arduino doesn’t in and of itself do anything. In some ways it’s like a whiteboard: the whiteboard doesn’t write on itself, it’s what you do with the whiteboard that makes it a useful tool. This is why Arduino is called a platform. It enables you to build all kinds of amazing things, but it’s a blank canvas. To quote SparkFun:

If you feel the need to purchase a book and have no electronics background, I would suggest Getting Started with Arduino. It’s very basic and I read it cover-to-cover in one afternoon.
Purchasing an Arduino
I have been lucky enough to get all my Arduinos (yes I have a collection) at technical conferences (SendGrid was giving them away at PyCon), hackathons, and Maker Faire.
However, you can easily purchase one (or many!) on the Internet from places like Adafruit, SparkFun and even Amazon. The Arduino I am using in these examples is an Arduino UNO.
Before you purchase your Arduino, I suggest you read through this tutorial (especially the “Getting started” section) because you might want to purchase a kit that includes an Arduino.
My very first Arduino.
Unboxing
When you purchase an Arduino, you are purchasing a circuit board with a microcontroller.
A microcontroller is a small computer; there are microcontrollers in almost everything: microwaves, coffee machines, power drills, you get the idea. It doesn’t even come with the USB cord you need to connect it to your laptop.
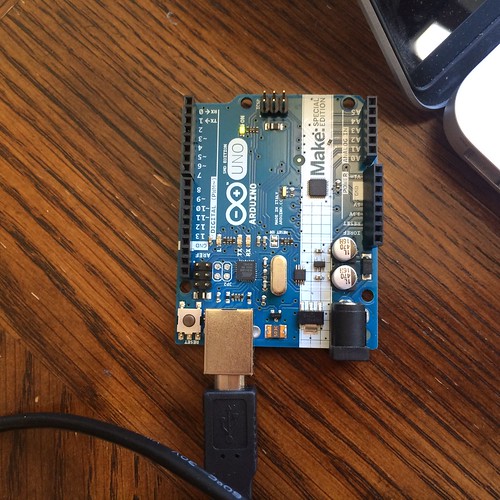
Here is what an Arduino looks like out of the box:

The top one is a plain Arduino Uno, the bottom one is an Arduino Uno SMD I got at Maker Faire (hence the “Make: Special Edition” printed on the board) – but they are almost exactly the same. They have different microprocessors, but you can do the same types of hacks with both.
Getting Started
I have found it’s very helpful to buy a kit that has some of the nice add-ons you need to build some sweet stuff.
The kits often contain a USB cord and some of the components you need to get started. Here is the kit I bought on Amazon – it’s nothing too fancy and less than $20:
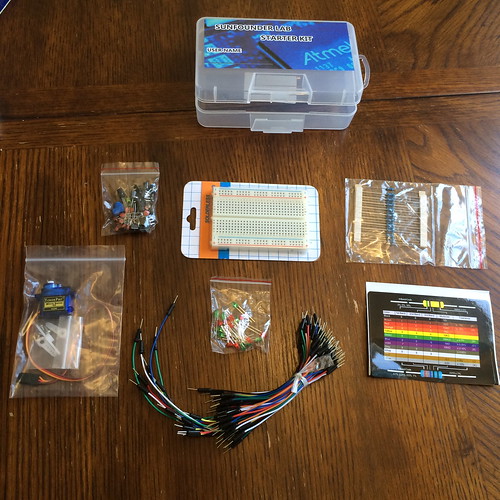
I already had a USB cord, but there are several kits on Amazon that come with a USB cord.
Adafruit also sells several kits that have been well-received and include an Arduino.
Plug In Your Arduino
Step 1: Install the Arduino IDE. This includes some instructions for how to get your computer to recognize the Arduino.
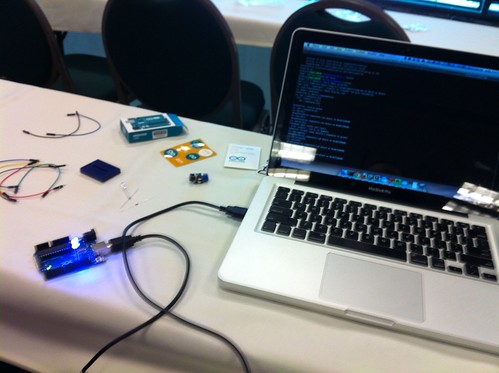
Step 2: I find it useful to ensure the computer recognizes the Arduino before I start programming. What if you write your whole program and can’t get it to talk to the board? Specifically, this means ensuring the correct board and serial port are selected: 7 | Select your board and 8 | Select your serial port. If your computer can successfully talk to your Arduino, then the ON button (green one) should come on and the L button blinks orange:
Step 3: If you want to see something cool, stick the longer (positive) end of an LED in the #13 pin (a pin is a slot on the Arduino board) and the shorter (negative) end in the GND pin (GND stands for “ground”).
 Just don’t leave it plugged in for too long! The LED will draw too much current, burn really bright, get really hot and then die.
To read more awesomeness about LEDs, checkout this tutorial from Adafruit that includes some very interesting LED knowledge:
Load Up the Firmware
Step 1: To program the Arduino using the IDE, you must use the Processing program language. Although this isn’t necessarily that hard, all the awesome 3rd party libraries (e.g. Twilio) don’t have Processing bindings. So let’s use something a little more fun: Python!
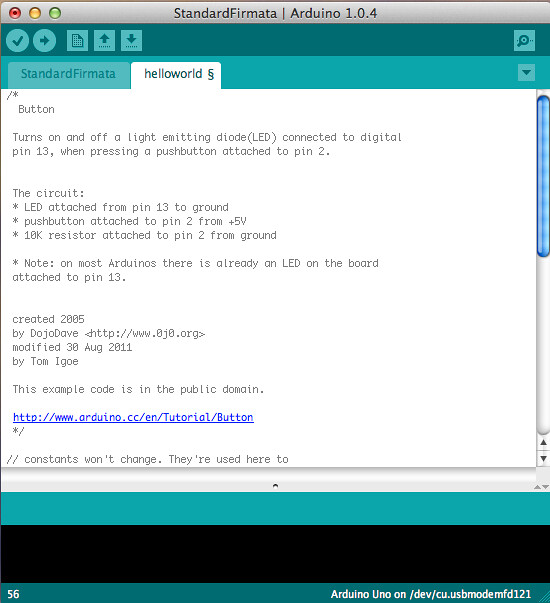
Step 2: There are many different ways to talk to your Arduino using Python. The first step is to install the StandardFirmata on your Arduino. Firmatta is a protocol used to by a computer to communicate with the microcontroller.
• Open the Arduino IDE, select: File > Examples > Firmata > StandardFirmata.
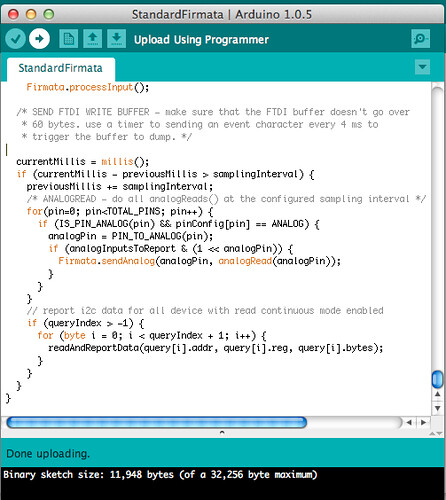
• Click the “Upload” button (arrow that points to the right).
• You should see a success message at the bottom of the IDE (“Done uploading”).
Once you have the Firmatta installed, you can talk to the Arduino using pyFirmatta or any library built on top of pyFirmatta.
In the following example, we are going to use a library called BreakfastSerial that is built on top of pyFirmatta (meaning is abstracts away some of the complexities of pyFirmatta, much like Python abstracts away complexities of C).
BreakfastSerial is a great beginner library and can get you going fast. However, if you want to do more complex things, you will likely need to drop down to the pyFirmatta layer. For example, BreakfastSerial does a great job of abstracting away a lot of the physics of circuits and you don’t have to worry about analog vs digital pins on the Arduino, but as you gain experience I have found it’s fun to dig deeper and understand more of what’s going on “behind the scenes”.
Send a SMS Text Message
We are going to go through a simple example where you can send a SMS text message by pressing a button on your Arduino!
Step 1: Assemble all the parts you need:
• 6 wires (color and length don’t matter – they are all the same).
• 1 10K ohm resistor.
• 1 button.
• 1 LED (I’m using a red one in the photos below).
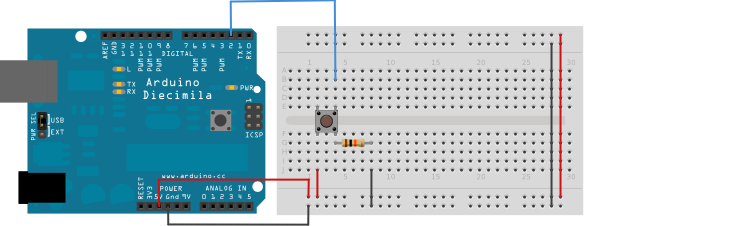
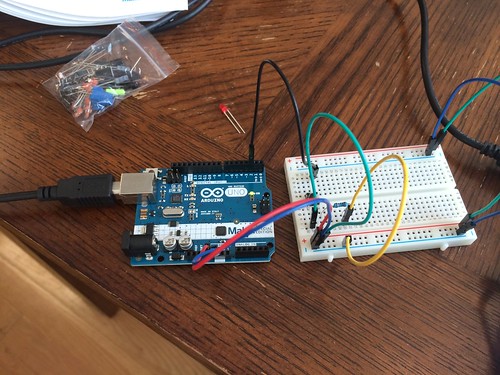
Step 2: Hook up your Arduino according to this diagram (replicated below). It doesn’t matter if your Arduino looks exactly the same, the important part is that you hook the wires up exactly as in the picture and into the correct pins on the board (#2, 5V and GND).

It should look like the following photos (apologies that it is hard to see the little black button, but it is there on the breadboard). I also placed an LED in pin #13 as demonstrated in the Plug in Your Arduino step. You can see it sitting next to the board in the first photo and in pin #13 in the second photo:

If you’re wondering “What is a resistor? Why do I need a resistor?” you should read this great answer on Electronics StackExchange. Here are all the resistors in my kit with the resistance labeled; I chose the one that says “10K”:
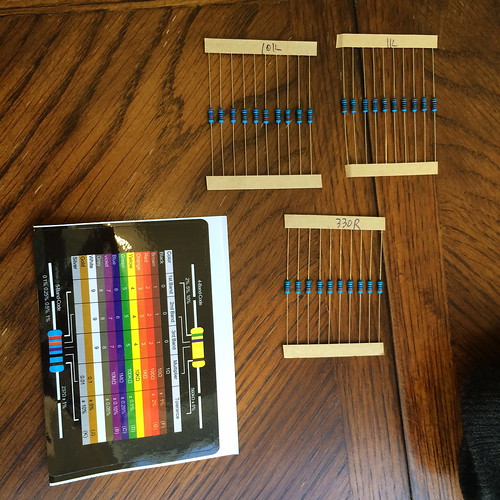
If your resistors don’t have a handy label on them, you can still tell the resistance from the colored markings on the resistor itself. Here is a guide to decoding the colored markings.
Step 3: I have written some code that we are going to run on your Arduino. Fork my txtduino repository on GitHub. My code assumes you have LED hooked up to pin #13 and the button hooked up to pin #2. If you have used different pins, you will need to modify the code.
Step 4: Ensure you install the requirements (txtduino depends on both pyFirmatta and BreakfastSerial, so both those libraries will be installed when you install the requirements):
$ pip install -r requirements
Step 5: Sign up for a free Twilio account.
Step 6: In settings.py, you’ll see several variables you need to fill in with information from your Twilio account (your access key, phone number, etc.):
twilio_account_sid = 'PUT YOUR TWILIO ACCT SID HERE'
twilio_auth_token = 'PUT YOUR TWILIO AUTH TOKEN HERE'
your_phone_number = 'PUT YOUR PHONE NUMBER HERE'
your_twilio_number = 'PUT YOUR TWILIO PHONE NUMBER HERE'
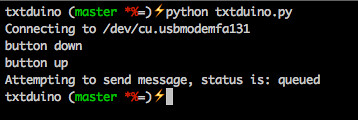
Step 7: Run the code on your Arduino!
$ python txtduino.py
The LED will blink several times while establishing a connection to the Arduino. After you see the message “Connecting to …” you can now try sending your text message by pressing down firmly on the button. I have added debugging statements so you can ensure your button press is registering. If you don’t see the message “press down” then press the button again harder.
If all is hooked up correctly, you should see the following output:
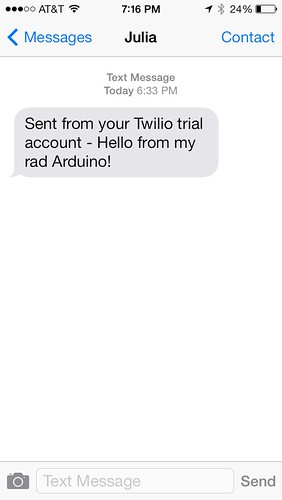
Step 8: It can take several minutes for Twilio to send the text message, but it’s usually quite quick. You’ll see:
Step 9: Now you can modify the code to do even more cool stuff – maybe send an email? You can try out the SendGrid API for example.
Step 10: If you’re itching for more hardware, you can checkout all the awesome boards and other components we have on Tindie from hardware hackers like yourself all over the world! There is an entire Arduino section with a wide variety of shields. Shields are boards that can be plugged on top of the Arduino extending its capabilities, for example you can buy a retro gaming shield so can play games like Tetris on your Arduino:

Want to Learn More?
I have found that in order to get better at building more complex circuits it helps to know a little physics. Here is a great video to explain the basics:
While watching this video keep in mind that the Arduino has 5V and 3.3V pins on the board. Don’t worry so much about the code, just focus on the notion of Ohms Law.
Adafruit also has some great Arduino tutorials.
Also, a friend of mine created a tutorial to teach kids the basics of programming on an Arduino. She teaches this at Boys and Girls clubs and I’ve heard it’s a great success.
Hope you enjoyed the tutorial! Isn’t hardware awesome?
This post was originally posted at Julia Grace’s blog.